The location of a dryer’s lint filter varies by manufacturer and model. Locating and cleaning this component is crucial for efficient drying and fire prevention.
The lint filter, often called a lint screen or trap, is a vital part of any clothes dryer. Its primary function is to capture loose fibers from clothing that are released during the drying cycle. This prevents these fibers from accumulating in other dryer components, such as the heating element or exhaust vent, which can lead to reduced efficiency, longer drying times, and, in severe cases, fire hazards. Think of it as the dryer’s personal sieve, ensuring only air passes through efficiently.
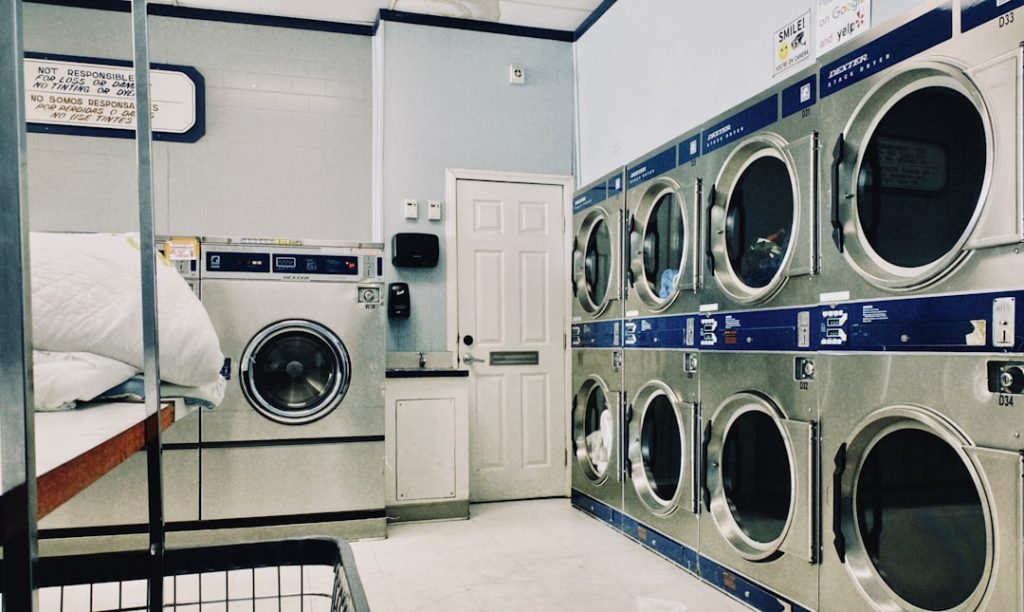
Front-Loading Dryers: A Common Configuration
The most frequent location for a lint filter on front-loading dryers is within the door opening. As you open the dryer door, the filter is usually situated at the bottom of the opening, often in a slot or housing. It typically slides out for cleaning. This placement allows for easy access before and after each drying cycle.
Under the Lip of the Door Frame
Many front-loading models position the lint filter directly beneath the lip of the door frame. When the door is closed, the filter is concealed. Upon opening the door, the user will see a rectangular or elongated slot at the base of the opening. The filter itself is a screen, often encased in a plastic frame, designed to be pulled out horizontally.
Integrated into the Door Itself
In some front-loading designs, the lint filter might be integrated into the door panel itself. This can manifest as a removable section of the door that houses the screen. While less common, this design still serves the same purpose and requires the user to detach this portion of the door to access the filter.
Top-Loading Dryers: Access from Above
Top-loading dryers often present a different approach to lint filter placement. Access here is typically from the top of the machine.
Inside the Drum, Near the Agitator
For many older or simpler top-loading models, the lint filter is found inside the dryer drum. It is commonly located near the center, often attached to or adjacent to the agitator (the central column in some top-loading machines). These filters are usually a cylindrical mesh or a flat screen that can be pulled or unscrewed from its housing.
Beneath the Lid Hinge Area
Another common location for top-loading dryers is in the area beneath the lid, often near the hinges. This placement can make it somewhat less obvious than filters located directly within the drum. The user would typically need to lift the lid and scan the inner rim or the area just below where the lid attaches to the main body of the dryer. These filters often slide out or unclip.
If you’re curious about the importance of maintaining your dryer beyond just locating the lint filter, you might find this article insightful: The Hidden Fire Hazard: Why Dryer Vent Cleaning is Essential. It highlights the potential fire risks associated with clogged dryer vents and emphasizes the necessity of regular cleaning to ensure your dryer operates safely and efficiently.
Locating Obscure Lint Filter Placements
While the aforementioned locations are the most common, some dryer manufacturers employ less conventional designs for their lint filters. These might require a more thorough inspection of the appliance.
Within the Lint Trap Housing
Some dryers feature a separate lint trap housing, which is a dedicated compartment for the filter. This housing might be a small drawer or a pull-out unit located in various positions.
Under the Control Panel
In certain dryer models, the lint filter housing can be found beneath the control panel. This requires the user to look for a small drawer or slot integrated into the lower portion of the control console. These are usually designed to be pulled out to reveal the lint screen.
On the Side of the Dryer Cabinet
Less frequently, a lint filter might be located on the side of the dryer cabinet. This could be a small, flush-mounted panel or a visible slot. When encountering such a design, the user should examine the sides of the dryer with careful attention.
Integrated into the Exhaust Vent Assembly
A few unique dryer designs have their lint filters integrated directly into the exhaust vent assembly. This means the filter is not a separate, removable component in the typical sense, but rather a mesh or screen built into the part of the dryer that connects to the external vent.
Removable Screen within the Vent Tube
In these instances, the user would need to disconnect the dryer from its exhaust vent. Upon doing so, they might find a removable screen or a mesh guard within the opening of the dryer’s internal vent tube. This design necessitates a more involved cleaning process, as it requires accessing the vent connection.
The Importance of Regular Lint Filter Cleaning

The function of the lint filter is paramount to the safe and efficient operation of a clothes dryer. Neglecting its maintenance is akin to allowing a vital artery to become clogged, leading to serious consequences.
Preventing Fire Hazards
Lint is a highly flammable material. When it accumulates on the heating element or within the dryer’s internal components, it can ignite from the heat generated during the drying cycle. According to fire safety organizations, clogged lint filters are a leading cause of clothes dryer fires. Regular cleaning is the most effective preventative measure against such dangerous situations.
The Role of Heat and Flammable Fibers
The dryer’s heating element generates temperatures that can easily ignite accumulated lint. The air currents within the dryer can carry these flammable fibers directly to the heat source. A clean filter acts as a barrier, intercepting these fibers before they can reach a point of ignition.
Exhaust Vent Blockages and Overheating
Beyond the immediate risk of ignition on the heating element, a clogged lint filter also restricts airflow. This restricted airflow causes the dryer to overheat, further increasing the risk of fire. It also forces the dryer to work harder, leading to premature wear and tear on its components.
Enhancing Drying Efficiency
A clogged lint filter significantly impedes airflow within the dryer. This reduced airflow prevents hot air from circulating effectively around the clothes, forcing the dryer to run for longer periods to achieve the desired dryness. This not only wastes energy but also increases wear on clothing.
Airflow as the Drying Engine
Think of airflow as the engine of your dryer’s drying process. When this engine is choked by lint, it cannot perform optimally. Hot air needs to move freely to carry moisture away from the clothes. A clean filter ensures this unimpeded flow, allowing for faster and more thorough drying.
Energy Consumption and Cost Savings
By allowing proper airflow, a clean lint filter enables the dryer to operate at peak efficiency. This means shorter drying cycles, which translate directly into lower energy consumption. Over time, these energy savings can become quite substantial, making regular cleaning a financially sound practice.
Extending Dryer Lifespan
The accumulated lint within a dryer not only poses a fire risk but also puts undue stress on the appliance’s components. Overheating and increased workload can lead to premature failure of the motor, heating element, and other parts.
Reducing Strain on Mechanical Parts
When the dryer struggles to push air through a clogged filter, the motor has to work harder. This prolonged strain can degrade the motor over time, leading to costly repairs or the need for a replacement. Similarly, the heating element can be subjected to higher temperatures for longer durations, shortening its lifespan.
Preventing Damage to Heating Elements
The heating element is a critical component that relies on adequate airflow for proper cooling. If lint obstructs this airflow, the heating element can overheat and become damaged. A clean filter acts as a guardian for this expensive part.
For professional dryer vent services, visit the AACO Dryer Vent Cleaning and Repair Map Location to find the nearest provider.
How to Clean the Lint Filter

Cleaning the dryer lint filter is a straightforward process that should be performed regularly. It does not require specialized tools or extensive technical knowledge.
Initial Removal of Loose Lint
The first step is to carefully pull the lint filter from its housing. Once removed, you will see a layer of lint adhering to the mesh screen. Gently use your fingers to pull away the bulk of this lint. Dispose of the lint in a trash receptacle.
Rolling and Peeling the Lint Surface
Often, the lint will come off in a large sheet or in rolls. You can gently roll the lint between your fingers to loosen it and then peel it away from the screen.
Avoiding Excessive Force
It is important not to use excessive force when removing the lint, as this could damage the delicate mesh of the filter.
Deep Cleaning for Stubborn Residue
For filters that have accumulated a greasy or waxy residue, a more thorough cleaning method is recommended. This residue can come from fabric softeners or dryer sheets.
Washing with Warm Water and Mild Soap
Remove the lint as described above. Then, wash the filter under warm running water. You can use a small amount of mild dish soap or laundry detergent to help break down any oily residue. Gently scrub the mesh with a soft brush or cloth if necessary.
Rinsing and Thorough Drying
Rinse the filter thoroughly to remove all soap residue. Ensure the filter is completely dry before returning it to the dryer. Residual moisture can lead to mold growth or negatively impact drying performance. You can air dry it or gently pat it with a lint-free towel.
When to Replace the Lint Filter
While lint filters are designed for durability, they can eventually become damaged or degraded.
Tears or Holes in the Mesh
Inspect the lint filter for any tears, holes, or significant abrasion in the mesh. A damaged filter will allow lint to pass through, compromising its effectiveness and potentially leading to safety issues.
Warping or Damage to the Frame
The plastic frame that surrounds the lint screen can also become warped or damaged, especially if exposed to excessive heat. A damaged frame might make it difficult to insert or remove the filter properly, or it may not sit securely in its housing. If the filter is compromised in any way, it is best to replace it with a new one.
If you’re trying to locate the lint filter on your dryer, you might find it helpful to read more about the importance of maintaining your dryer for optimal performance. Regular cleaning not only enhances efficiency but also reduces the risk of fire hazards. For further insights, check out this informative article on dryer vent cleaning practices that can help keep your appliance in top shape. You can find it here: dryer vent cleaning.
Troubleshooting Lint Filter Issues
| Dryer Brand | Lint Filter Location | Frequency of Cleaning | Common Issues if Not Cleaned | Tips for Maintenance |
|---|---|---|---|---|
| Whirlpool | Inside the door frame or on top of the dryer | After every load | Reduced drying efficiency, fire hazard | Remove lint after each use, vacuum filter slot monthly |
| LG | Inside the door opening, near the bottom | After every load | Longer drying times, overheating | Clean filter and surrounding area regularly |
| Samsung | On top of the dryer or inside the door | After every load | Lint buildup, potential fire risk | Check and clean lint filter before each use |
| GE | Inside the door opening or on top of the dryer | After every load | Clogged vents, inefficient drying | Clean lint filter and vent ducts periodically |
| Maytag | Inside the door or on top of the dryer | After every load | Fire hazard, increased energy use | Remove lint and inspect filter for damage |
Sometimes, users may encounter difficulties either locating or using their dryer’s lint filter. Understanding potential problems can help resolve them efficiently.
Difficulty Locating the Filter
If you are struggling to find the lint filter, consult your dryer’s owner’s manual. The manual will provide a diagram and specific instructions for your model.
Consulting the Owner’s Manual
The owner’s manual is the definitive guide for your appliance. It will clearly illustrate the location of the lint filter and provide detailed instructions for its removal and cleaning. If you no longer have the physical manual, most manufacturers make digital copies available on their websites.
Systematic Inspection of All Possible Locations
If the manual is unavailable, a systematic inspection of all possible locations is recommended. Start with the most common areas – within the door opening for front-loaders and inside the drum or beneath the lid for top-loaders. Then, expand your search to less common spots like under the control panel or on the sides of the cabinet.
Lint Filter Not Fitting Properly
If the lint filter doesn’t slide in or out smoothly, or if it feels loose when in place, there might be an issue.
Obstructions in the Housing
Check the lint filter housing for any lint build-up, foreign objects, or damage that might be preventing the filter from seating correctly. Clear any obstructions carefully.
Damaged or Warped Filter
As mentioned previously, a damaged or warped filter may not fit properly. If the filter itself appears compromised, replacement is the likely solution. Ensure any replacement filter is specifically designed for your dryer model.
Filter Appears Clean but Dryer is Inefficient
Even with a seemingly clean filter, a dryer’s efficiency can be impacted by other factors.
Blocked Exhaust Vent
The most common reason for this is a blockage in the dryer’s exhaust vent hose or the external vent cap. This prevents hot, moist air from escaping the dryer, leading to longer drying times.
Internal Clogs or Mechanical Issues
Less commonly, there might be internal lint build-up further down the exhaust system or a mechanical issue with the dryer’s fan or motor. In such cases, a professional appliance repair technician may be required.
FAQs
Where is the lint filter typically located on a dryer?
The lint filter is usually located either on the top edge of the dryer door opening or inside the door frame itself. Some models may have the filter inside the drum or on the front panel.
Why is it important to clean the lint filter regularly?
Cleaning the lint filter after every load helps improve dryer efficiency, reduces drying time, prevents overheating, and minimizes the risk of fire caused by lint buildup.
How can I identify the lint filter if I can’t find it immediately?
Look for a removable screen or mesh trap that collects lint. It is often a rectangular or square-shaped piece that slides or lifts out easily. Consult your dryer’s user manual for the exact location.
Can I use the dryer without the lint filter in place?
No, operating the dryer without the lint filter can cause lint to accumulate inside the dryer vent and exhaust system, leading to poor performance and potential fire hazards.
How do I clean the lint filter properly?
Remove the lint filter and use your fingers or a soft brush to remove lint buildup. For a thorough clean, rinse the filter with warm water and let it dry completely before reinserting it into the dryer.